This before/after example now shows every uploaded toy action figure test pair. Each row compares the source photo with the generated blister-pack result, including the neutral collectible, sports medal, and neon cycling editions.
All Source and Result Examples
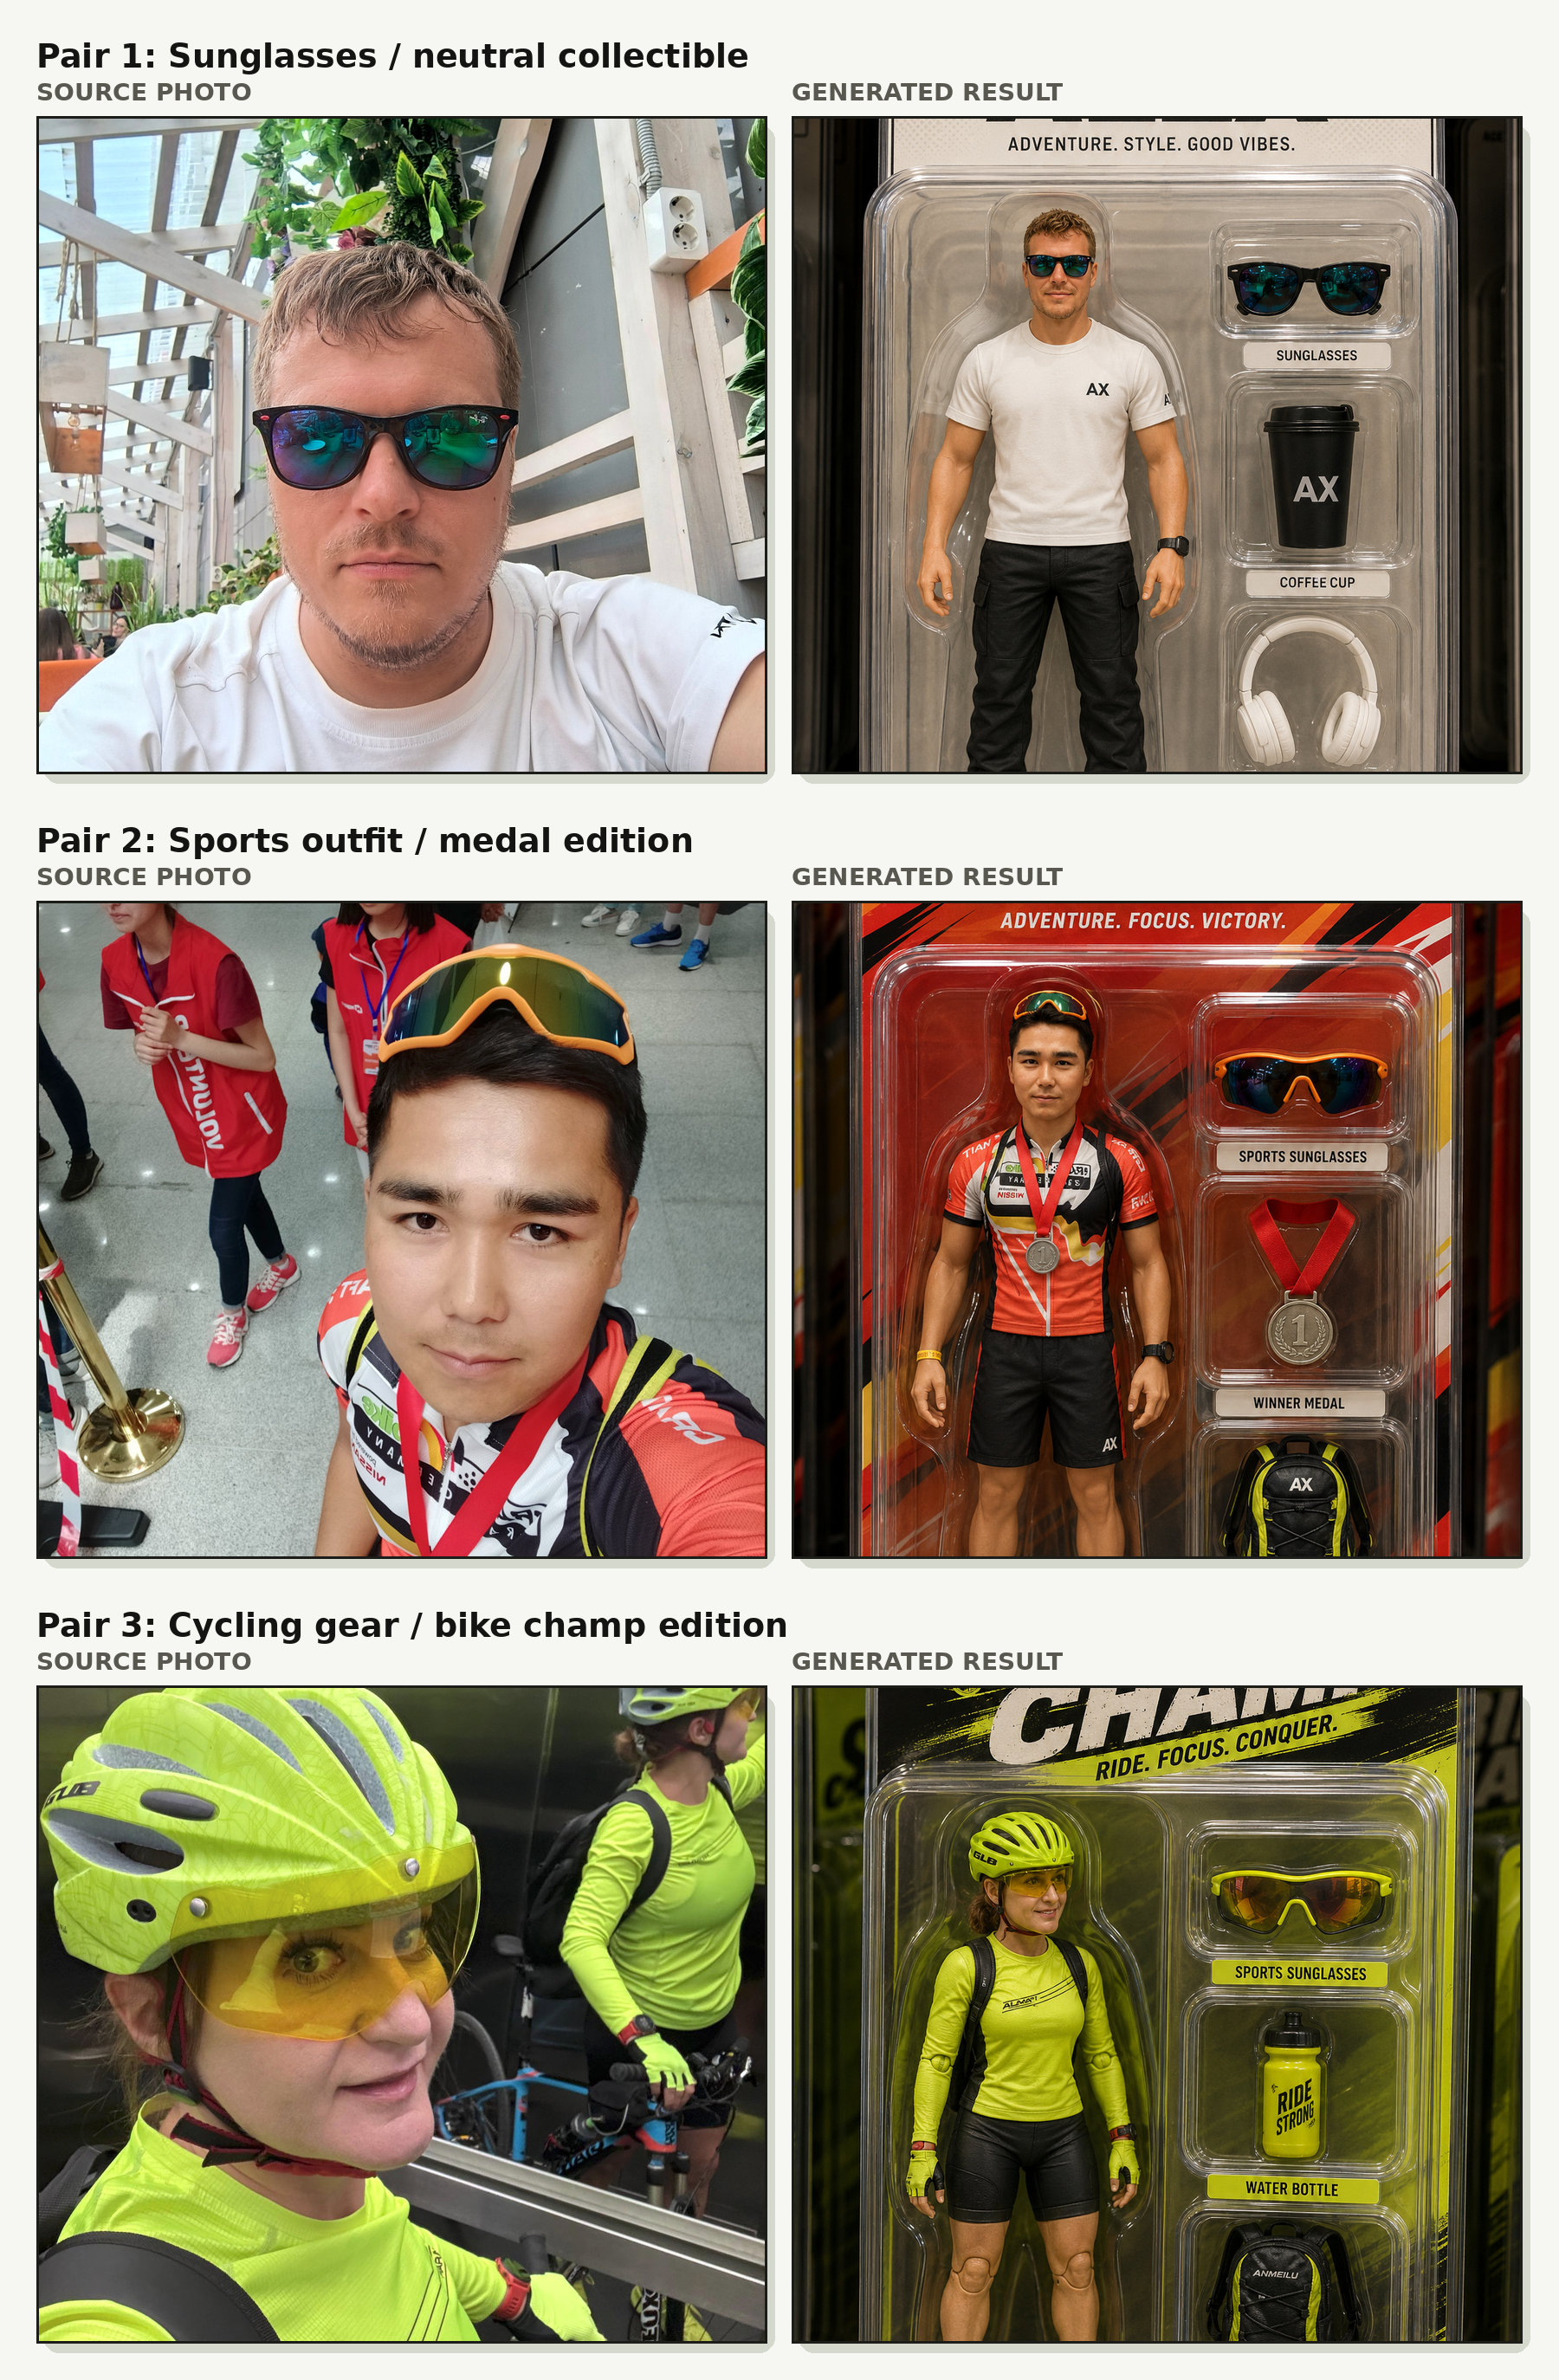
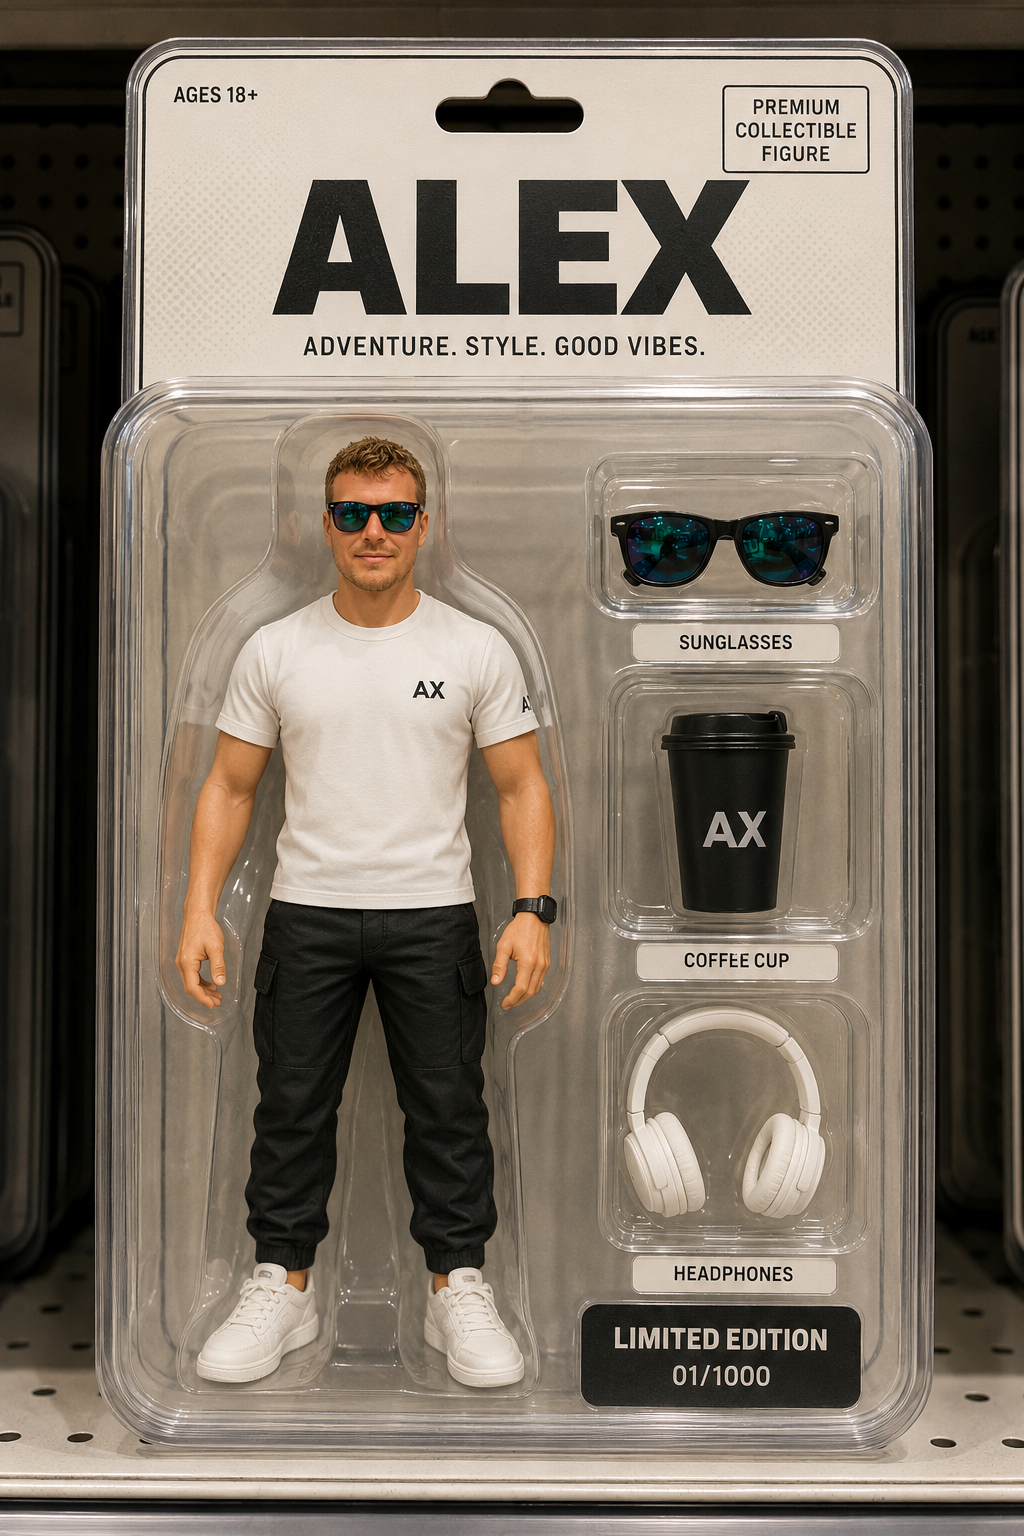
Pair 1: sunglasses and neutral collectible packaging

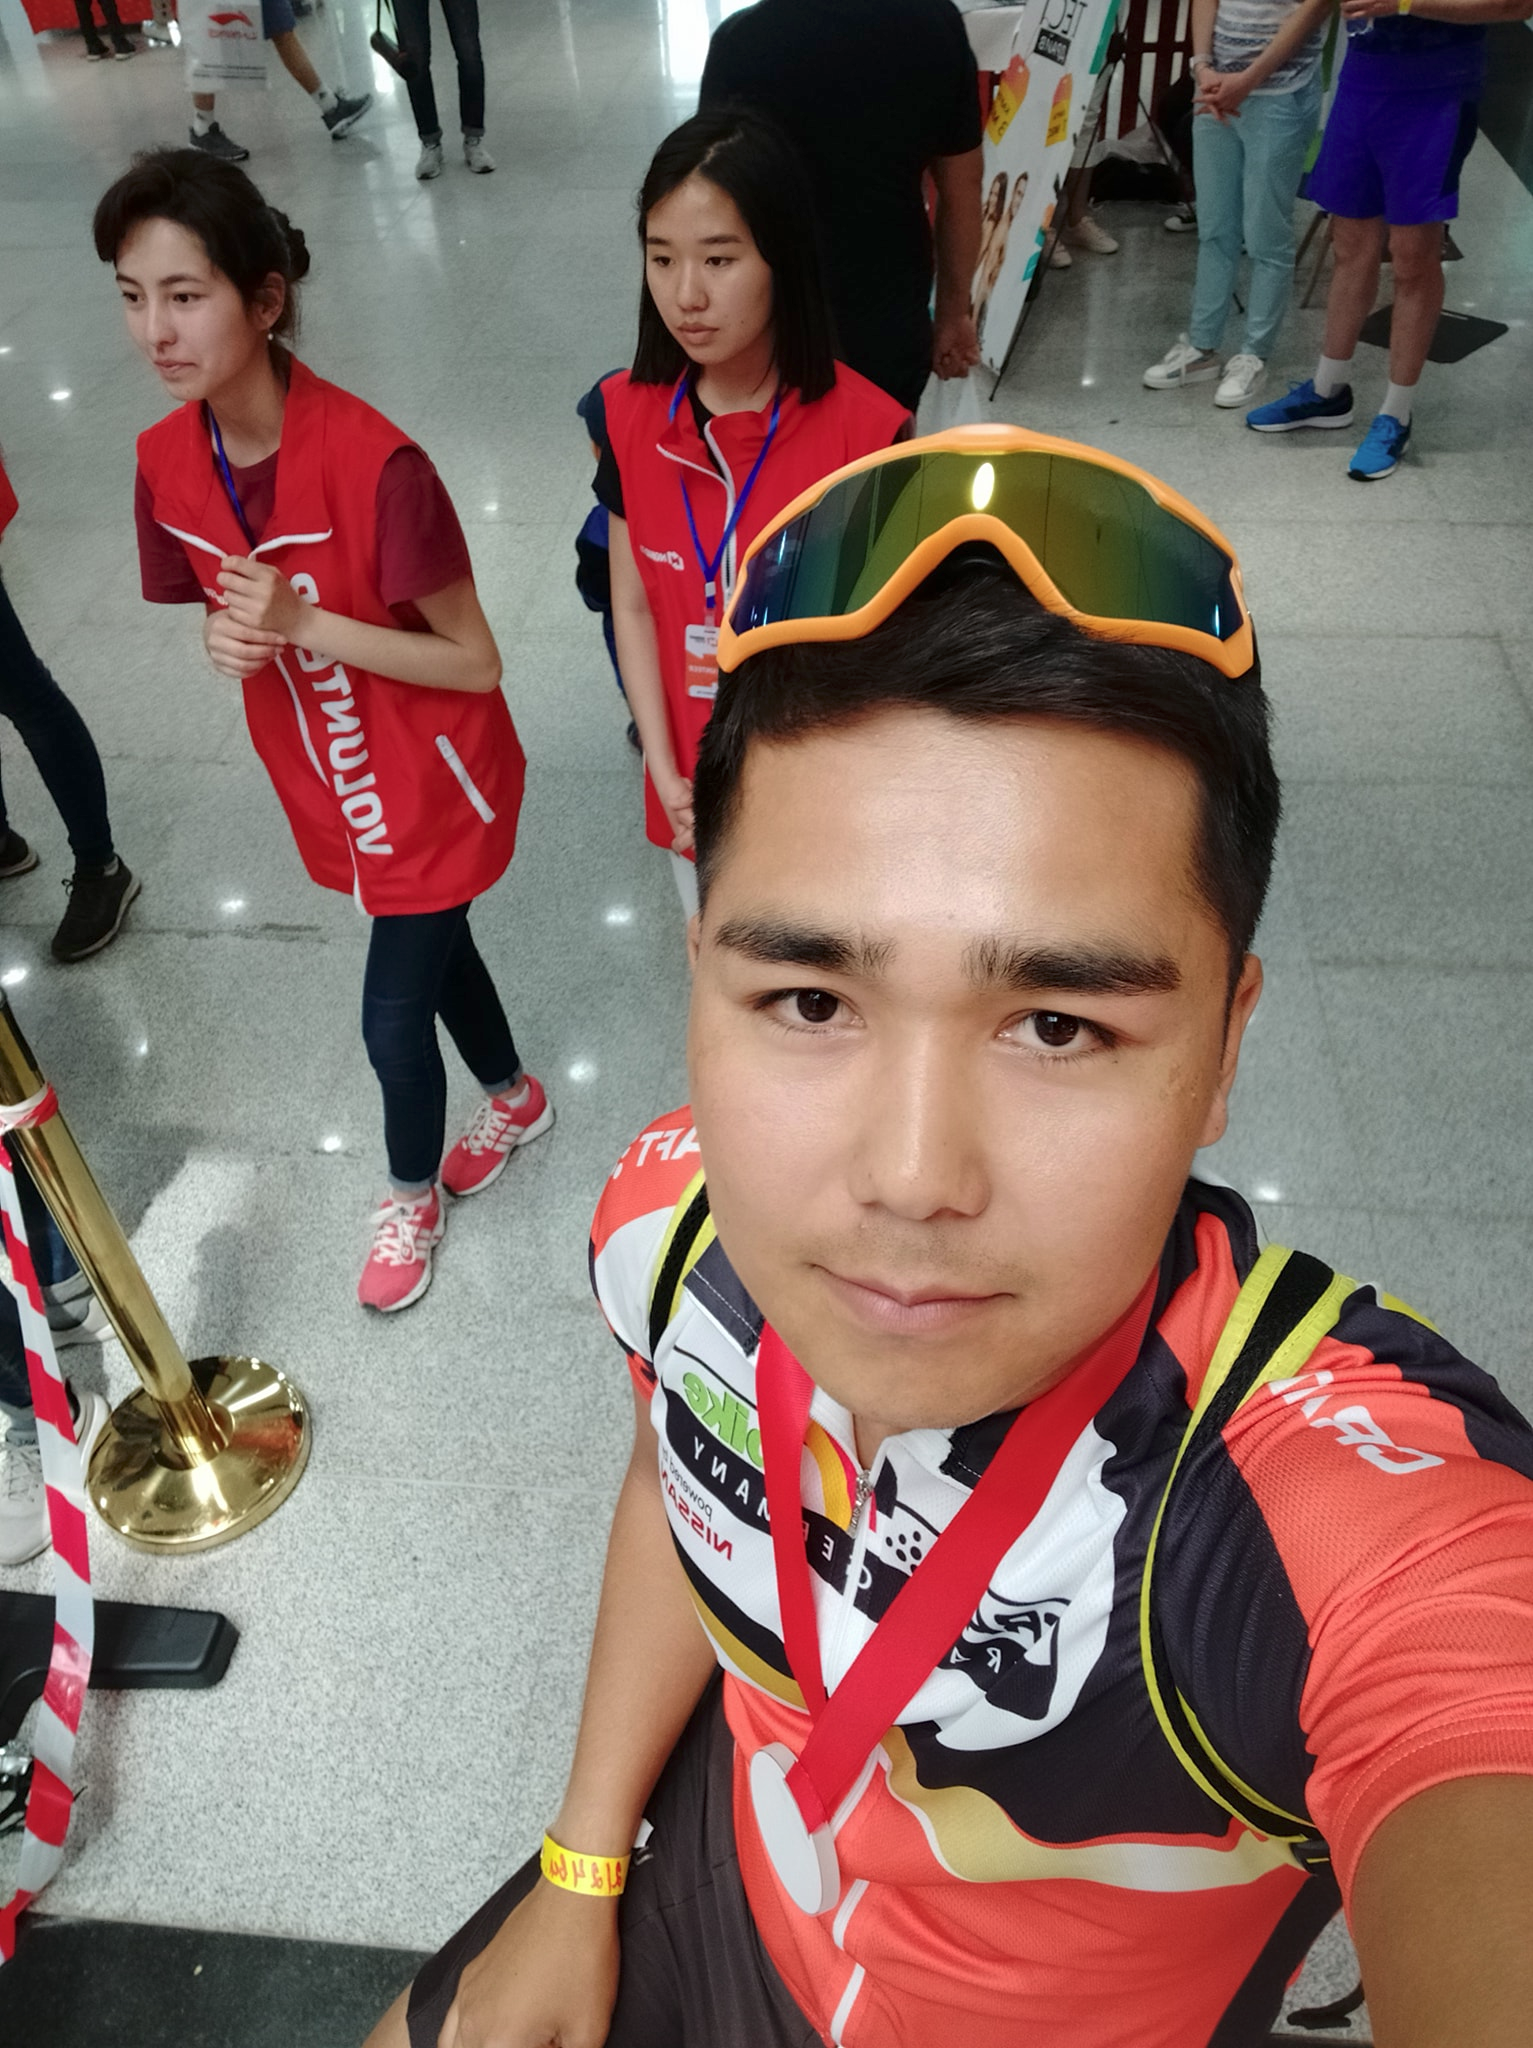
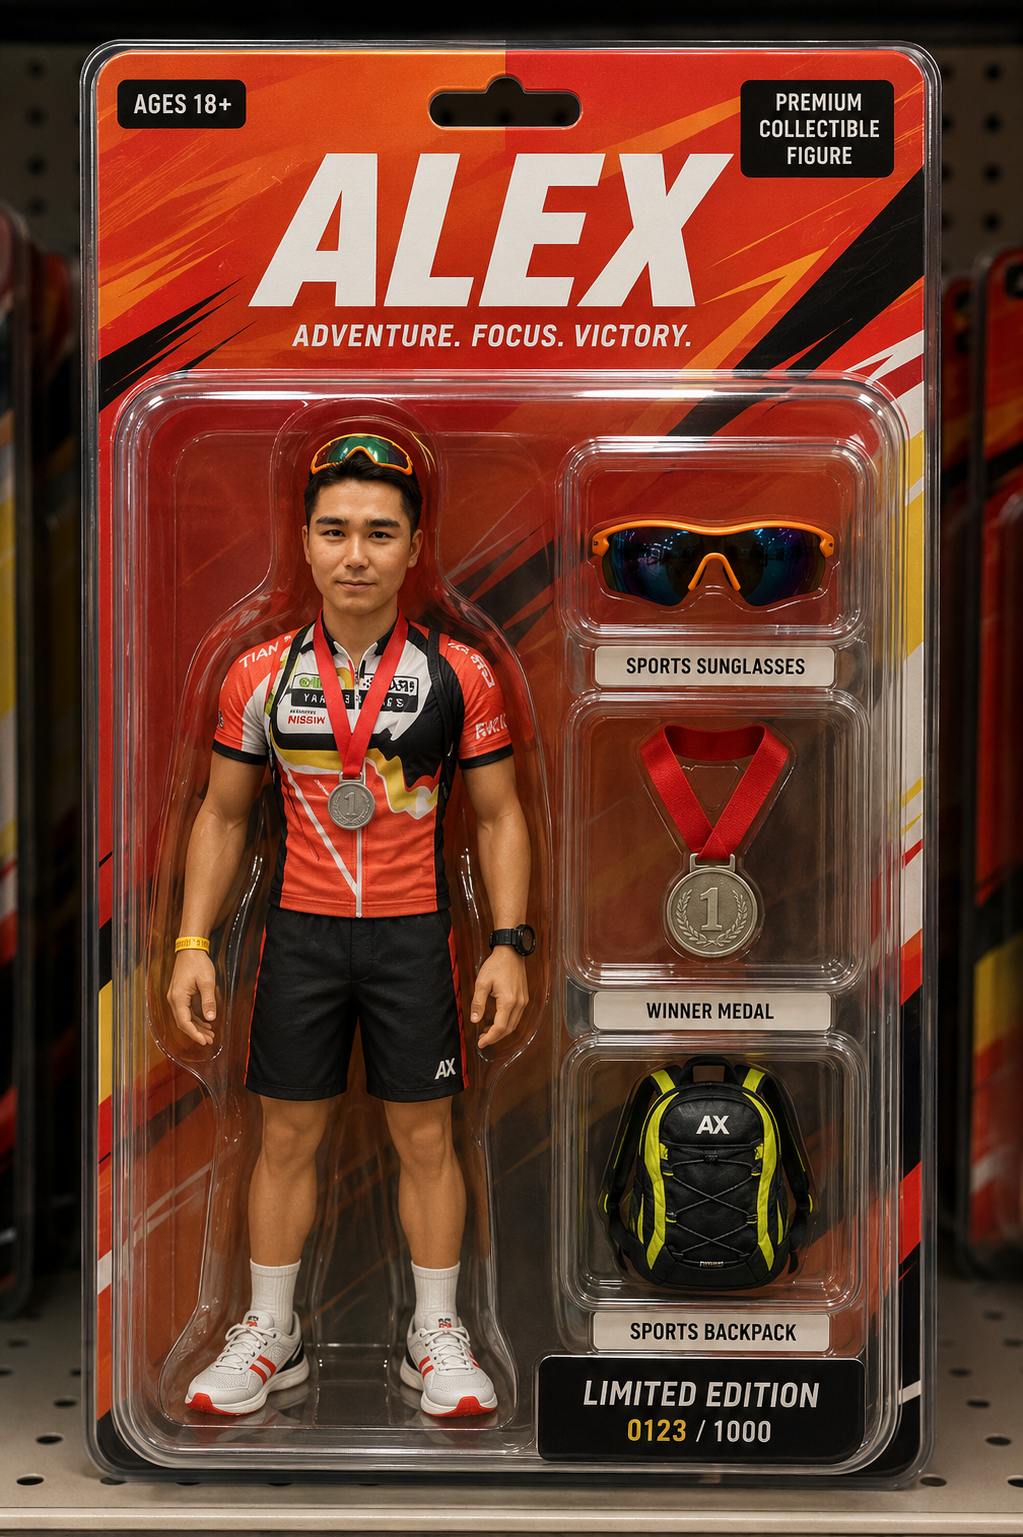
Pair 2: sports outfit and medal edition
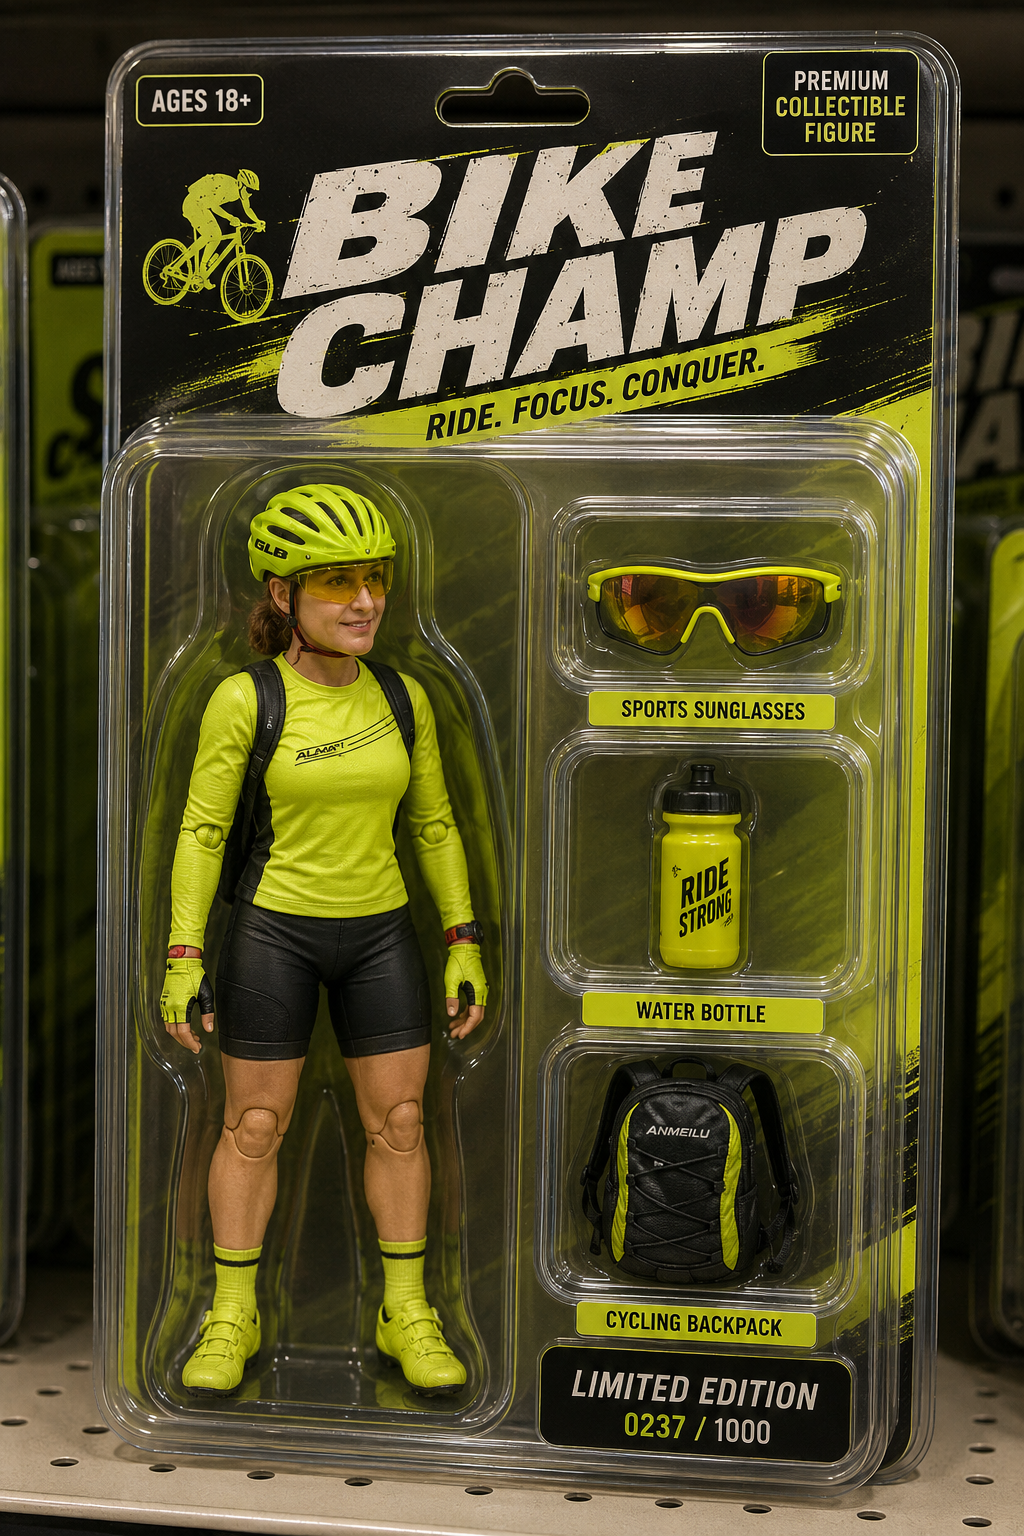
Pair 3: neon cycling gear and bike champ edition

Comparison Notes
The prompt works best when it uses visible outfit colors and accessories as packaging design cues. The generated results place the figure upright in a molded plastic tray and reserve side compartments for themed accessories.
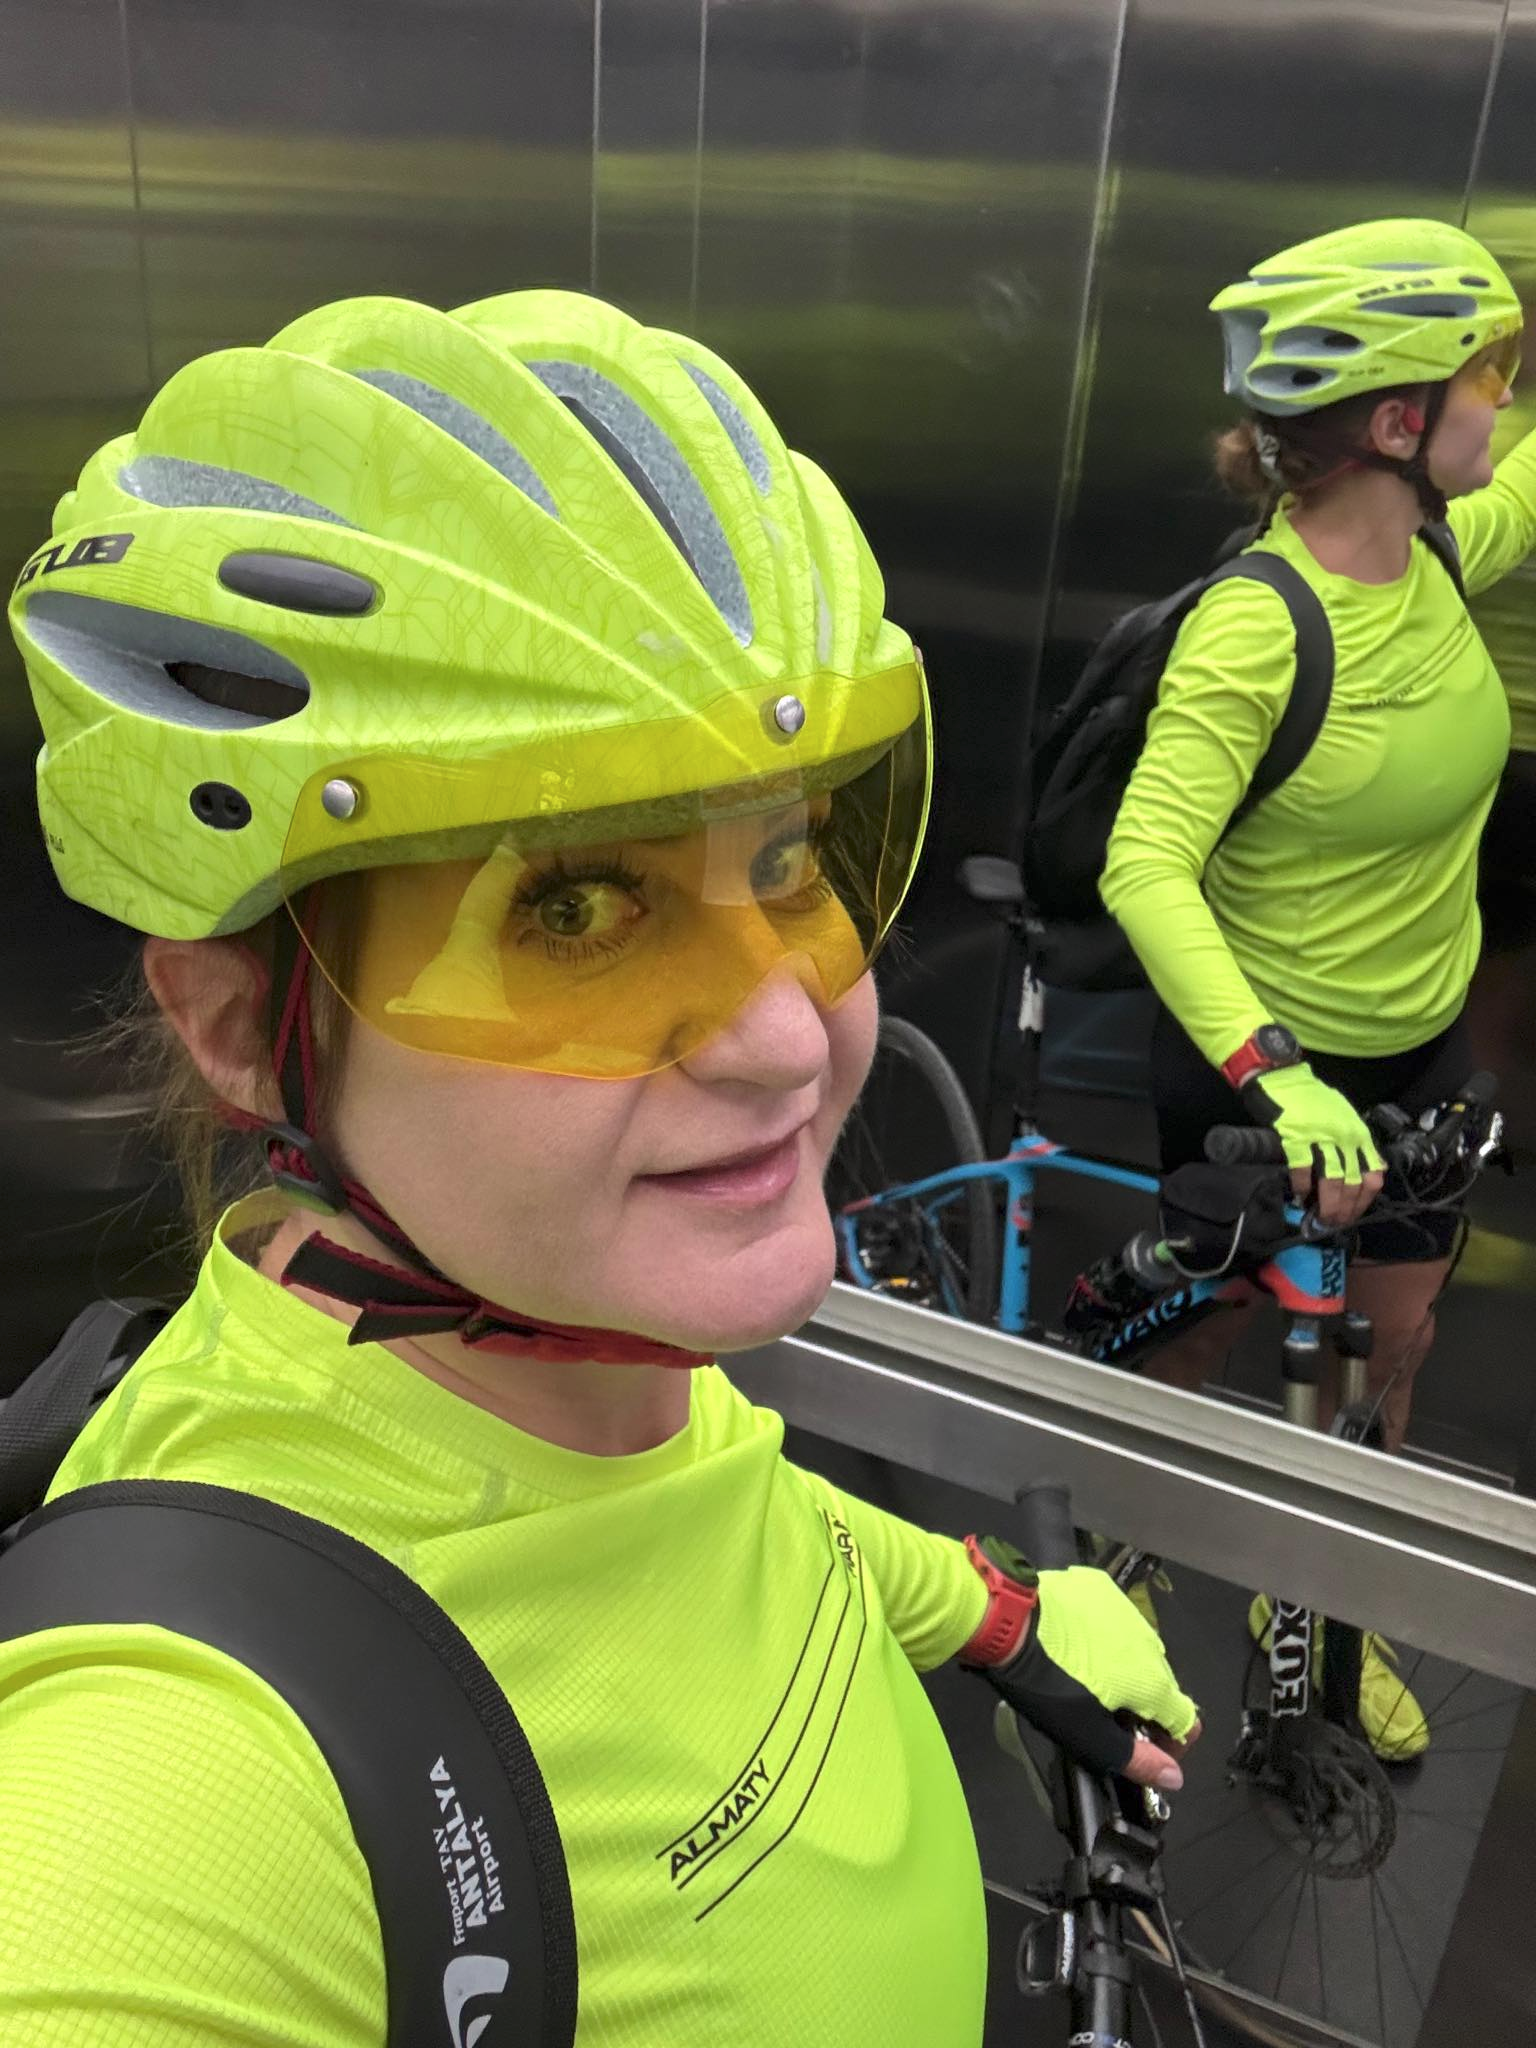

Before prompt
Use this photo to create a stylized action figure in a premium blister pack.
After prompt
Use the provided portrait photo as the character reference and create a stylized premium collectible action figure in a clear plastic blister pack. Keep the face recognizable from the reference while making the figure toy-like, friendly, and relaxed, with a natural smile and upright full-body pose inside the molded plastic tray. Match the packaging colors to the outfit in the photo and design the card back like a retail-ready collectible product. Add a bold header with the action figure name, a short subheading underneath, and three separate accessory compartments beside the figure. Each accessory should relate to visible cues from the photo, such as sunglasses, cycling gear, a backpack, a coffee cup, headphones, a medal, or a water bottle. Use professional product photography lighting, sharp packaging details, clean reflections on the blister plastic, realistic shelf depth, and readable label areas.
Analysis
The generated result converts the source photo into a retail-style toy package while keeping the neon cycling palette, helmet, eyewear, backpack cue, and accessory-compartment structure.